For information on what a form is, see the form view.
|
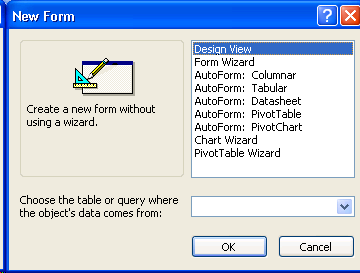
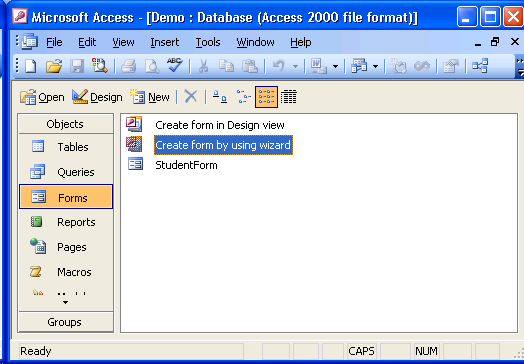
To create a form object in Microsoft Access you first click on the Form button in the list of object types. As shown in the picture to the right, clicking on the Form object type displays two methods for creating a new form object:
In this class, we will always use the wizard to create a form. You can double-click on the "Create form by using wizard" entry to start the wizard. |

|
|
You may also click on the "New" button (see You would then select "Form Wizard" and click the "OK" button. |
|
|
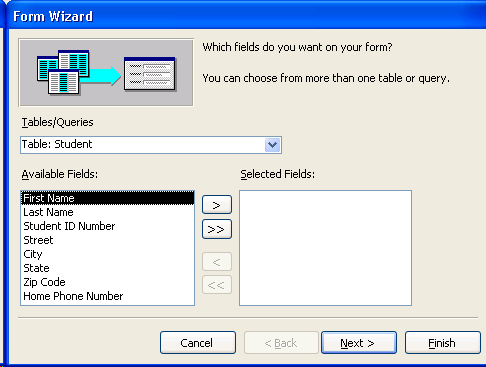
In either case, a Form Wizard dialog box is shown: |
|
 ) to display the "New Form" dialog box:
|
Form Wizard Step 1In the first step of the Form Wizard, you must select the fields you want to display on your form.
|
|
In this demonstration, all of the fields in the Student table were moved to the Selected Fields list. |
|
|
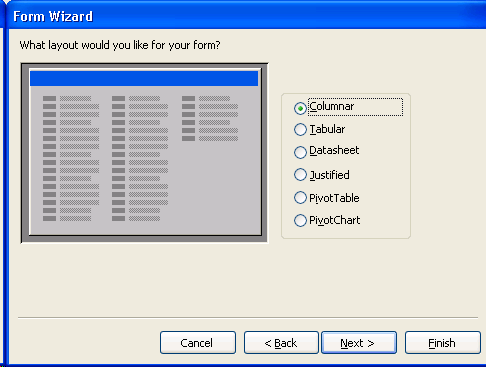
Form Wizard Step 2In the second step of the Form Wizard, you identify the basic layout you would like to use for your form design. In this class, we will always be use the Columnar layout, which is the default layout. Feel free to select other layout options to get a preview of what this layout would look like. Be sure to switch the layout back to Columnar before continuing with the next step of the wizard. Click the Next button once you've selected the layout for your form design. |
|
In this demonstration, the Columnar layout was used. |
|
|
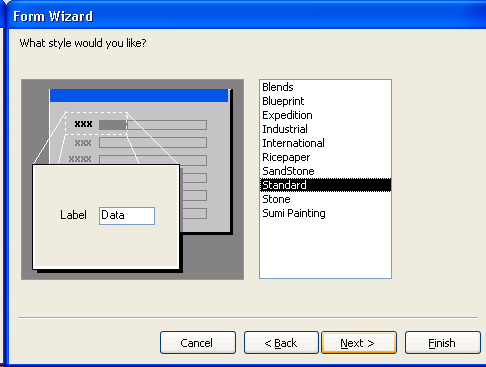
Form Wizard Step 3In the third step of the Form Wizard, you identify the style you would like to use for your form design. You may select styles to get a preview of what each style would look like. Click the Next button once you've selected the style for your form design. |
|
In this demonstration, the Standard style was used. |
|

|
Form Wizard Step 4 (last step)In the fourth step of the Form Wizard:
The question "What title do you want for your form?" is misleading. In this wizard, the word "title" means name. Click the Finish button to complete the wizard. |
|
In this demonstration, the "title" was changed to StudentForm and the option to display the form view (to show data) was selected. The form view displayed at this time looks like the picture on the right: Please see the form view for information on this view. |

|
|
At this point, the form window was closed to redisplay the database window. As shown in the picture to the right, the database window now shows the 1 form object that is stored in this database. Let's say that we want to change the design of the form. To do this, we need to open the StudentForm object in the Form Design View. We can do this in one of two ways:
|
|
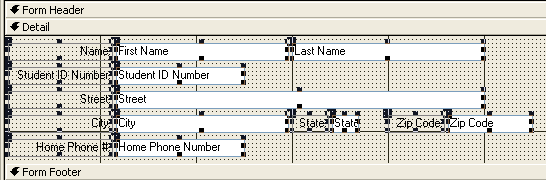
The StudentForm object, using all of the fields from the Student table, the Columnar layout, and the Standard style, looks like the following:
StudentForm in Design View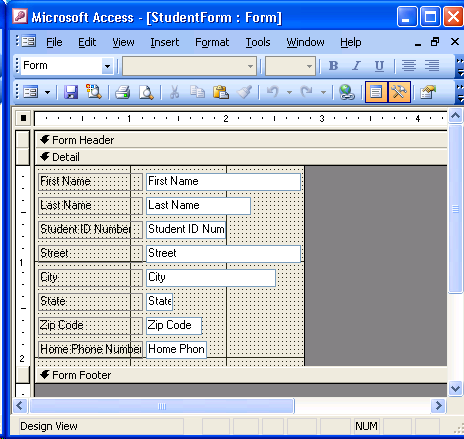
|
StudentForm in Form View
|
Observations on these form views
The first column of user controls are Labels. A Label dislays text to the user. The second column of user controls are Textboxes. A Textbox displays data to the user. |
|
Use Design View to change the form design
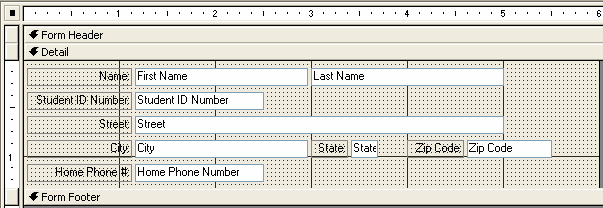
Let's say that we want to change the design of the form so that it looks similar to the following:
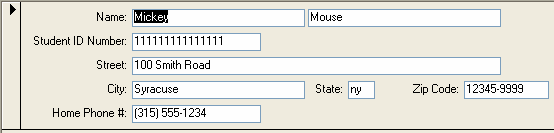
| Redesigned StudentForm in Design View | Redesigned StudentForm in Form View |
|
|
How was the StudentForm object redesigned?
To do this: make sure you are in form design view, click on a Label user control, and then click on the Align Right button in the toolbar. To do this: make sure you are in form design view, click on a Label user control, pause, click again on the same Label user control. The cursor is now inside the Label user control. Strike the End key on the keyboard to move the cursor to the end of the text, type a colon, and then strike the Enter key on the keyboard. To do this: make sure you are in form design view, click on a Label user control, pause, click again on the same Label user control. The cursor is now inside the Label user control. Move the cursor with the arrow keys and change the Label text value by deleting and typing characters, as appropriate. Strike the Enter key on the keyboard when you are done modifying the Label text value. To do this: make sure you are in form design view, click on the Last Name Label user control, and then strike the Delete key on the keyboard. |
|
|
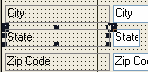
To do this: make sure you are in form design view, and then click on the State Label user control. At this point, there should be eight graphic handles around the State Label user control, and one large graphic handle at the upper-left corner of the State textbox user control, as shown in the picture on the right. To change the width of the State Label user control, position the mouse pointer over the middle graphic handle on the left-edge or right-edge of the user control. The mouse pointer shape should change to a double-ended arrow. Click and drag the mouse to the left or right to change the width of the user control. |
|
To do this: Follow the same procedure as described above for changing the width of a Label user control. The only difference is that you would click on the Textbox user control so that it has the eight graphic handles around it. To move a Label and its associated Textbox user control together: make sure you are in form design view, and then click on the Label user control. The eight graphic handles are now around the Label user control, and the one large graphic handle is in the upper-left corner of the associated Textbox user control. Now move the mouse pointer over the border of the Label user control. When the mouse pointer shape changes to a black hand showing the thumb and four fingers, click and drag the Label user control to its proper location within the form. Use the grid and the rulers to help you align the user controls appropriately. To move only a Label user control: make sure you are in form design view, and then click on the Label user control. The eight graphic handles are now around the Label user control. Now move the mouse pointer over the large graphic handle in the upper-left corner of the Label user control. When the mouse pointer shape changes to a black hand showing the thumb and a pointing index finger (the other fingers are in a fist), click and drag the Label user control to its proper location within the form. Note that if this Label has an associated Textbox user control, the Textbox user control does not move. Use the grid and the rulers to help you align the Label user control appropriately. To move only a Textbox user control: Follow the same procedure as above for moving only a Label user control, except click on and drag the large graphic handle in the upper-left corner of the Textbox user control. |
|
More on the Form Design View
The following list identifies some additional design features and capabilities found in the form design view.
|
You can select all of the user controls in design view by selecting Edit, Select All from the menu. The keyboard shortcut for this is Ctrl-A. Once this is done, every single user control has eight graphic handles around it, as shown below:
 To unselect all of the user controls that are currently selected, click on any part of the form grid that does not have a user control. You can individually select user controls by holding down the Shift key and clicking on each user control you want to select. You can select user controls in an area of the form by clicking and dragging the mouse. A selection box is drawn based on where you started the click and in which direction you dragged the mouse. Any user control inside or touching the selection box will be selected when you release the mouse buttonl. |
|
Select the user controls whose font type you want to change, then select a font type from the drop down list: 
|
|
Select the user controls whose font size you want to change, then select a font size from the drop down list: 
When you change the font size, it is likely that you need to adjust the height of the user controls. For example, all of the user controls in the following StudentForm have had their font size changed from 8 to 14. 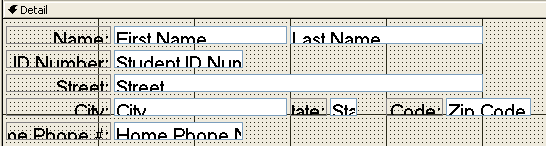 As you can see, the height of the user controls does not match the font size - the words in the user controls are being cutoff. The easiest to fix this situation is to have Access automatically adjust the height of every user control based on its font size. This is done be selecting Format, Size, To Fit from the menu. As a result of doing this, the StudentForm now looks like the following: 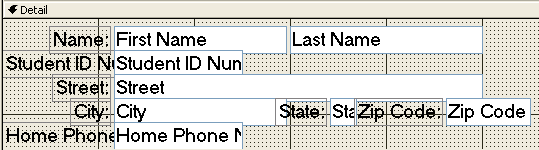 The height of each control now matches the font size, however, the user controls overlap each other because of the height adjustment that was just done. At this point, we would need to move and reposition the user controls so that they no longer overlap each other. |
|
The Format, Align menu contains five options - Top, Bottom, Left, Right, To Grid.
After you've selected two or more user controls, all five of these options are available to you. Each of these Format Align menu options will align the selected user controls along one of the four edges of the selected user controls, or it will align the selected user controls to the grid. It is best to play with each of these alignment options to see what it does. When doing this, selecting just two user controls should allow you to quickly learn how each alignment option behaves. |
|
To add a title to the Form Header section, use the form design view to do the following:
 Strike the enter key on the keyboard when you've typed in your new form title. A new Label user control has been created in the Form Header section. |
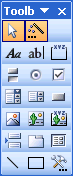
 on the toolbar to display the Toolbox window. The Toolbox window will look similar to the following:
 found inside Toolbox window.
 also found in the datasheet view. These buttons behave the same here as they do on the datasheet view.