|
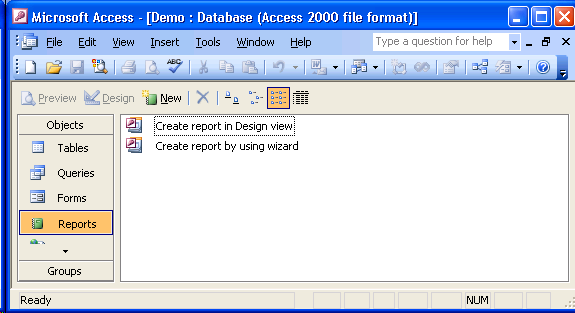
To create a report object in Microsoft Access you first click on the Report button in the list of object types. As shown in the picture to the right, clicking on the Report object type displays two methods for creating a new report object:
In this class, we will always use the wizard to create a report. You can double-click on the "Create report by using wizard" entry to start the wizard. |
|
|
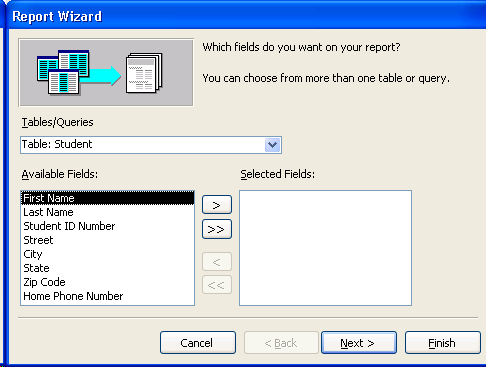
The Report Wizard dialog box is shown: |
|
|
Report Wizard Step 1In the first step of the Report Wizard, you must select the fields you want to display on your report.
|
|
In this demonstration, all of the fields in the Student table were moved to the Selected Fields list. |
|

|
Report Wizard Step 2In the second step of the Report Wizard, you indicate whether you want to group data on the report using a particular field. A report grouping results in the report being sorted by the field specified as a grouping. A report is not required to have a grouping. Click the Next button once you've selected the fields you want to use for report groupings. |
|
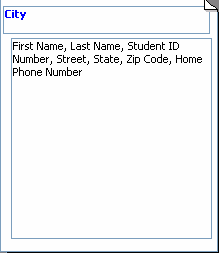
In this demonstration, the City field is used to group students. The City field was selected and then the right-arrow button clicked. The resulting report preview in the report wizard window now looks like the picture on the right: |
|
|
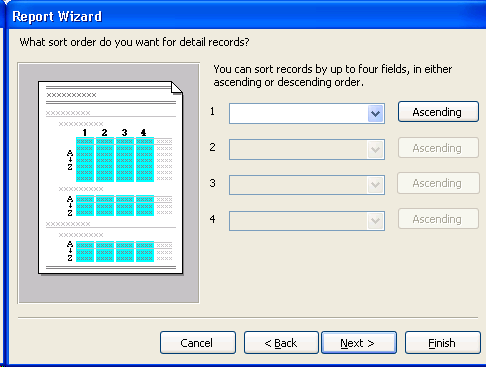
Report Wizard Step 3In the third step of the Report Wizard, you indicate whether you want to sort the data on the report using a particular field. As mentioned above, if a report grouping has been selected in step 2, the report will automaticaly be sorted by the report grouping fields. In this case, selecting a field to sort by means that within each grouping, multiple data records/rows will be displayed in sort sequence based on the sort fields specified in this step. When no report grouping is specified in step 2, selecting a field to sort by means that the report will be displayed in sort sequence based on the sort fields specified in this step. A report is not required to have any sort fields. Click the Next button once you've selected the fields you want to use for sorting. |
|
In this demonstration, no fields were selected for sorting. |
|
|
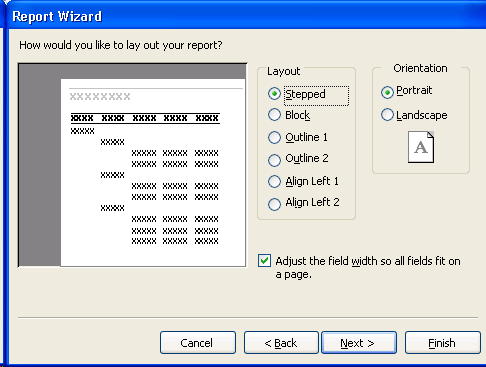
Report Wizard Step 4In the fourth step of the Report Wizard, you specify the report layout and page orientation. Clicking on any of the report layout options changes the report preview, giving you an indication of what each of the report layouts will look like. Choosing portrait or landscape for the page orientation is based on how much data is being included in the report. Click the Next button once you've selected the report layout and page orientation. |
|
In this demonstration, the Stepped layout and Protrait orientation was specified. |
|

|
Report Wizard Step 5In the fifth step of the Report Wizard, you specify the report style.. Clicking on any of the report style options changes the report preview, giving you an indication of what each of the report styles will look like. Click the Next button once you've selected the report style. |
|
In this demonstration, the Corporate style was specified. |
|
|
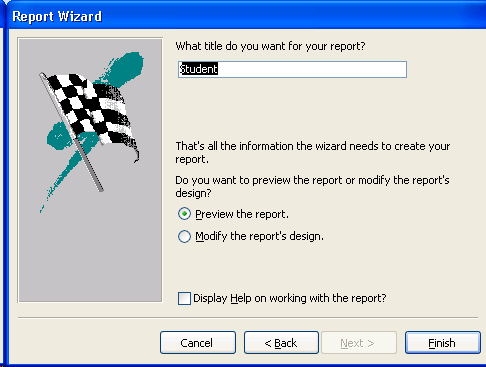
Report Wizard Step 6 (last step)In the sixth step of the Report Wizard:
The question "What title do you want for your report?" is misleading. In this wizard, the word "title" means name. Click the Finish button to complete the wizard. |
|
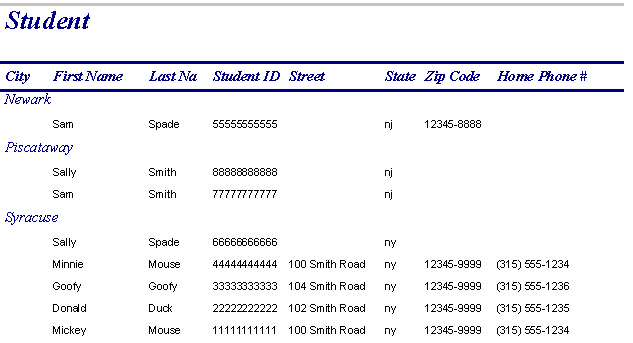
The report is displayed. This demonstration report looks like the following: 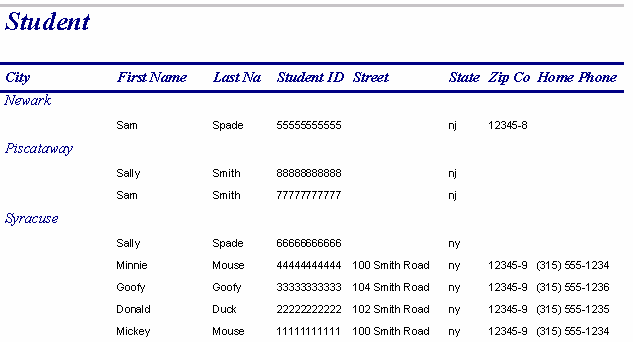 |
|
Use Design View to change the report design
The report above only shows the first six digits of a Zip Code data value. We can correct this using the Report Design View.
The Report Design View for this demonstration report is show below.
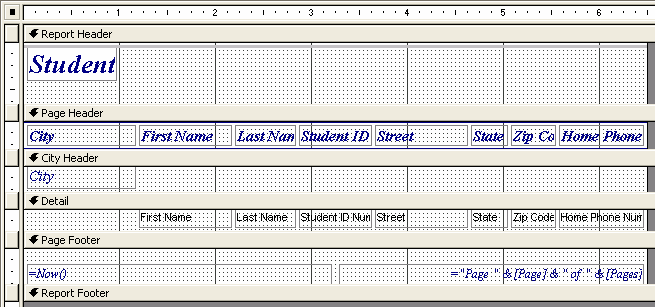
As you can see, the Report Design View is very similar to the Form Design View - it contains multiple sections, a grid to help with lining up user controls, and lots of Label user controls.
The report sections shown above are:
- Report Header - anything in this section will appear only at the top of page 1 of the report.
- Page Header - anything in this section will appear at the top of each page of the report.
- City Header - anything in this section will appear whenever a new City data value is encounted. This section exists because City was selected as a report grouping field.
- Detail - anything in this section will appear for each data record/row to be displayed in the report.
- Page Footer - anything in this section will appear at the bottom of each page of the report.
- Report Footer - anything in this section will appear only at the bottom of the last page of the report.
To demonstrate using the Report Design View, we want to change the width of the Zip Code Label user control in the Detail section so that all 9-digits will be displayed on the report. As you can see by looking at the report design view above, the Detail Section does not have any extra room to widen the Zip Code Label user control.
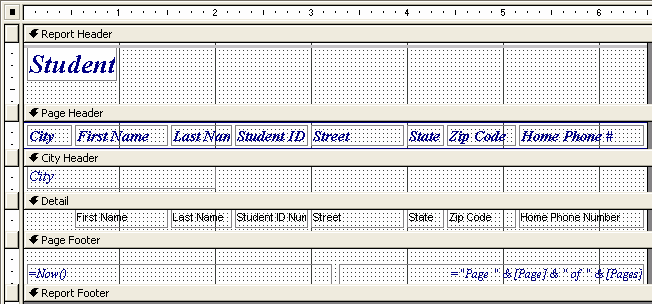
The solution used in this demonstration is to:
- Change the width of the City Label user control in the Page Header section. Make this label much narrower, but still wide enough to display the word City.
- Select the First Name through Zip Code user controls in the Page Header section and drag them to the left so that there is a little bit of space between the City and First Name user controls.
- Select the First Name through Zip Code user controls in the Detail section and drag them to the left so that the left-edge of the First Name user control is lined up underneath its corresponding user control in the Page Header section.
- As a result of the previous three steps, we can know make both of the Zip Code user controls wider.
- Switching between the report view and the design view, we continue to adjust the widths of the Zip Code and Home Phone Number user controls until we can see all of the data in the report.
The final report design is displayed below:
The final report is displayed below: